The overall design was originated in 1983 and the first bass was completed in 1985 as a four string with Curly maple neck, walnut body wings, ebony fingerboard and Alembic pickups/preamp.
Enjoy the benefits of a premium membership!
Upgrade Account
-
Welcome to TalkBass! Want to remove ads? Register an account and login to see fewer ads, and become a Supporting Member to remove almost all ads.
You are using an out of date browser. It may not display this or other websites correctly.
You should upgrade or use an alternative browser.
You should upgrade or use an alternative browser.
6 string Fretless with Ebony Neck
- Thread starter Slidlow
- Start date
More options
Who Replied?So first I laid out the body wing templates on the rengas blank. The piece is tight so a little fudging is required but as this is a six string and the wing templates were from my five I have a little room to move on the width. As all these pieces are close in width I am going to saw out the rengas first, attach and trim the Macassar ebony thin and then mark out, cut and attach the madrone burl top pieces. Lastly the gluing edges will be shot square to attach to the ebony neck blank. There will be a bit of cavity work on the rengas before assembly as well.

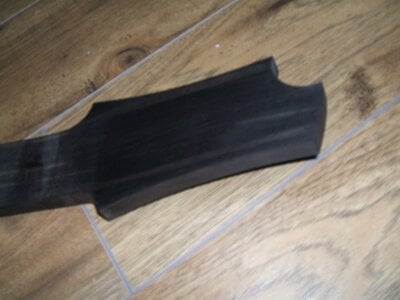
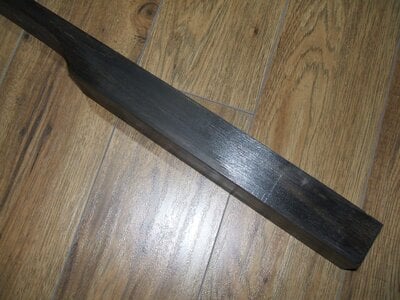
I had prepped the neck some time ago so I do not have detail pictures of the work done. The blank was cut from the board straight up though the headstock area and wings from offcuts attached to make up the headstock width. Then an ebony headplate was attached to give the top surface a even grain and finish. The neck was cut straight so I could get fingerboards from the rest of the ebony board and even a few smaller blanks from off the back of the neck. I try to cut my neck blanks well in advance of the build to allow them to settle out in case of any warping. Not such a big deal with laminated necks but one piece necks can be less stable as you remove material down to finish shape. This neck was roughed out about 4 years ago and then was finished to this level about 2 years ago. So far everything has stayed straight and stable so now is the time to build it up.
Attachments
So first I laid out the body wing templates on the rengas blank. The piece is tight so a little fudging is required but as this is a six string and the wing templates were from my five I have a little room to move on the width. As all these pieces are close in width I am going to saw out the rengas first, attach and trim the Macassar ebony thin and then mark out, cut and attach the madrone burl top pieces. Lastly the gluing edges will be shot square to attach to the ebony neck blank. There will be a bit of cavity work on the rengas before assembly as well.View attachment 2876341
You may not worry about grin direction, but if you do, I would lay one wing reversed (upside down) if the figure makes sense. This way you could have the grain running in the same direction again. Fingers crossed for the build!
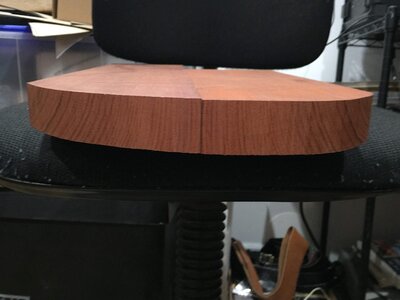
The slip match will give me a book match when viewed from the end. There will be the black expanse of the ebony neck to separate the wings so, as the back is all that will show of the rengas ( this is getting a book matched madrone burl top), the grain is not critical. Having said that the grain on the Rengas is very straight and even so it will look very nice. If you look at the five string pictures I posted the Paduak there was slip matched the same way.You may not worry about grin direction, but if you do, I would lay one wing reversed (upside down) if the figure makes sense. This way you could have the grain running in the same direction again. Fingers crossed for the build!
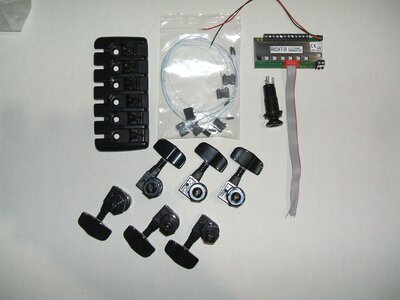
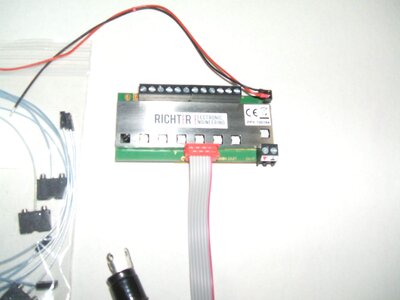
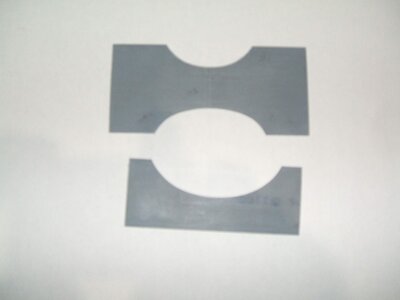
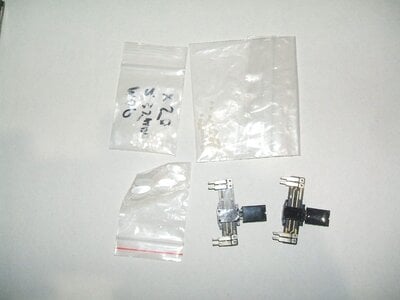
I thought I would pull out the hardware and check it over. The bridge is an inexpensive version six string picked due to its more narrow string spacing and the fact I wouldn't have to custom order one. It is pretty dense and I have used the five string version successfully before. I will modify it to receive the Graphtech piezo saddles. I am using a Richter piezo buffer that had individual gains for each string so I can balance the outputs. I am using a set of Schaller M2000 tuners as they are slightly smaller profile then others. Also found my neck profile templates and phosflorescent position markers for the side of the fingerboard. The two slider pots are for a possible tone circuit to edge mount. Haven't convinced myself of that yet and may just bring the signal straight out.


Last edited:
Rôckhewer
Commercial User
- Feb 28, 2015
- 2,816
- 8,351
- 5,121
- Disclosures
- Owner/Builder- RockHewer Custom Guitars LLC
That kind of prep & careful patience make for excellence in an "heirloom" worthy instrument.This neck was roughed out about 4 years ago and then was finished to this level about 2 years ago. So far everything has stayed straight and stable
Very cool.
I like the design... Clean... Elegant.
Sub'd
Rôckhewer
Commercial User
- Feb 28, 2015
- 2,816
- 8,351
- 5,121
- Disclosures
- Owner/Builder- RockHewer Custom Guitars LLC
Yes titanium and dual action. I ordered a half dozen of a custom length some years ago for 6 string necks and wider (anything requiring two rods). Two of these rods are lighter then one stainless steel rod and they are superior quality to anything I have seen before. The company is KTS and here is the US website Titanium Truss Rods.Titanium truss rods?
Dual action?
From where are you getting those.... please?
Last time a talked to them they had suspended manufacture of the rods. They are the people that did titanium bridges and retrofit saddles as well.
I was just on the KTS US website and only saw the single acting titanium truss rods. I guess would have Contact them to see if dual acting are being produced again.
Sorry I'm haven't posted for a bit. The wife has me involved in a bathroom reno. I did get to sand the ebony for the body lamination but she caught me!
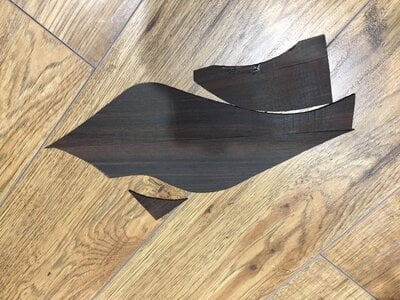
So moving forward a little. I am doing this a little backwards as I cut the ebony layer to profile before laminating. This is so I can save every cutoff piece for inlays and such. The ebony is from a salvaged acoustic set (too many cracks and imperfections) and I try not to waste anything.
For the main body section I found a really nice straight grained piece of Rengas and slip joint it for each half. I like to slip joint as it gives a bookmatch to the end and a cleaner look. As the board was straight grained any match on the back itself is not necessary.
Once I settle on the cavities and cross channels I will glue these up and then mark-
 out, cut and attach the madrone burl top.
For the main body section I found a really nice straight grained piece of Rengas and slip joint it for each half. I like to slip joint as it gives a bookmatch to the end and a cleaner look. As the board was straight grained any match on the back itself is not necessary.
Once I settle on the cavities and cross channels I will glue these up and then mark-
Attachments
I have the Macassar ebony layer attached to the rengas and now moving on to the madrone burl top.
Once everything is glued up I will final profile and start the round overs.


Once everything is glued up I will final profile and start the round overs.
Sorry I am not sure what you mean?its something like anoying because the designs usally look more square in paper than they do in wood, are you agree? i thought the current project that i am looks more rounded than how it looks in paper or in the design software.
Here is the neck/body templates laid out with the bridge.View attachment 2881230
the template looks more square than the cut you've made in the wood. it happened to me recently.So moving forward a little. I am doing this a little backwards as I cut the ebony layer to profile before laminating. This is so I can save every cutoff piece for inlays and such. The ebony is from a salvaged acoustic set (too many cracks and imperfections) and I try not to waste anything.
For the main body section I found a really nice straight grained piece of Rengas and slip joint it for each half. I like to slip joint as it gives a bookmatch to the end and a cleaner look. As the board was straight grained any match on the back itself is not necessary.
Once I settle on the cavities and cross channels I will glue these up and then mark-View attachment 2887347 out, cut and attach the madrone burl top.
Love it so far. I've been pining for a 6 string fretless with a piezo bridge. Thanks for turning me on to the Richter buffer.
Yes, the template is of the outer profile of the instrument. Naturally edges get rounded when finishing. The pieces cut so far are rough cut and will be further profiled and edges rounded.the template looks more square than the cut you've made in the wood. it happened to me recently.
I finished a fiver a few years ago and decided to do a six for myself. Just getting back to it after a move.Love it so far. I've been pining for a 6 string fretless with a piezo bridge. Thanks for turning me on to the Richter buffer.
