Build Number Three: 5 String Languedoc Tribute

Jan 16, 2015
151
568
4,551
49
Austin Texas
I have been commissioned for a tribute build inspired by Mike Gordon's Languedoc Dragon Bass. You Phish fans out there likely know the exact instrument I'm talking about. Paul Languedoc is a luthier based in Vermont that specializes in custom guitars. Only a few basses have been built by him. He built the Dragon Bass back in 89 when Phish was beginning to be widely recognized.

lK07R3ChLP-bAcsFcsIqk2domxqoDRUAaOHjI7bUV_8.jpg


Here is the mockup. The neck will look more like the picture above, with narrower block inlays and binding around the neck. The body shape has been modified to improve balance and ergonomics, primarily by widening the body slightly and elongating the front half, bringing the tip of the top horn in line with the 12th fret and moving the curve on the bottom forward to improve balance when played while seated.
Languedoc Tribute.jpg

Specs:
36" scale
24 frets
5 piece maple/walnut set-neck with ebony heel block
Walnut body with bookmatched flame maple top
Macasser ebony fingerboard with MOP inlays
Macasser ebony front headstock veneer with MOP logo inlay
Walnut back headstock veneer
Bound headstock and neck
Single action SS truss rod
Hipshot hardware
Kent Armstrong soapbar pickups w/Kent Armstrong MM3 preamp
 
Stupid question based on mock-up (where it might just be skipped as a pain to draw) - Dragon bass tribute with no dragon? Not that I can find any decent pictures of said dragon...i.e. the picture you have there is as good as any I've seen, and for looking at the dragon, it ain't good.
 
Stupid question based on mock-up (where it might just be skipped as a pain to draw) - Dragon bass tribute with no dragon? Not that I can find any decent pictures of said dragon...i.e. the picture you have there is as good as any I've seen, and for looking at the dragon, it ain't good.

Well it's more of a Languedoc tribute than anything else, minus the dragon, and that is what the customer wanted. One of these days, however, I would love to learn how to do intricate engraved inlays like the one on Mike Gordon's dragon bass. Maybe someday when my kids are grown up and I have more time and money to play with, I will work on that!
 
Last edited:
This week I worked on the truss rod assembly and cutting the truss slot. Since this is a 36" scale bass and none of the double action rods out there are longer than 24", I decided to go with a made from scratch single action truss rod, following Carl Thompson's design. This uses a 3/16" stainless rod and a cold-rolled steel slug for the anchor. The rod is not in a curved slot but in a tapered slot. The slot starts near the heel end, where a 1/2" hole was drilled with a forstner bit, and becomes shallower toward the nut. The slot tapers up 0.130" from heel to nut, which will basically follow the taper of the back of the neck once it is carved. The slot was cut using a 3/16" round nose bit. The same bit will be used to put a groove in the edge of a tapered piece of maple that will fit tightly in the slot, providing a perfectly round channel for the truss rod.

To cut the truss slot, I made two tapered pieces of maple that matched the 0.130" taper I was aiming for. These were taped to each side of the neck and acted like skids while the slot was being cut on my router table.
IMG_2319.jpg


IMG_2322.jpg


The threads were cut using a HSS 10-32 die and thread cutting oil. An acorn nut was drilled through and tapped.
IMG_2323.jpg


10-32 threads were cut on the opposite end of the rod and a cold-rolled steel slug was drilled and tapped. The end of the rod was hammered flat and super glue applied to lock the threads.
IMG_2324.jpg


IMG_2325.jpg


This weekend, I plan on making significant headway with this build. The fingerboard, headplate, shell, binding, and side dot material should arrive tomorrow.:bassist:
 

Attachments

  • IMG_2296.jpg
    IMG_2296.jpg
    51.1 KB · Views: 211
Truss rod installation complete. The rod fits snugly in a perfectly round channel. Unlike my other builds which used double action rods, knocking on this neck blank did not make the rod rattle.

To the left of the truss slot is the piece of maple I grooved the edge on using the router table setup shown. I then planed the strip down and finally sanded it to a snug fit in the truss slot.
IMG_2332.jpg


IMG_2333.jpg


Perfectly snug fit!
IMG_2338.jpg


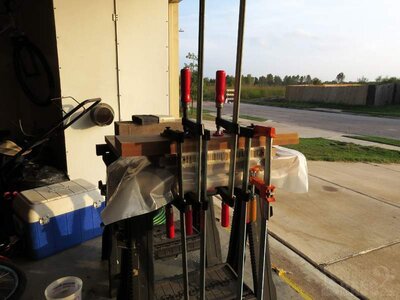
To glue the strip, I inserted it halfway, applied glue to the top half, then tamped it down with a mallet before clamping.
IMG_2340.jpg

IMG_2342.jpg


A square washer was made from a piece of 1/8" thick steel.
IMG_2346.jpg


IMG_2344.jpg
 
The reason I chose a single action rod is I have had trouble with rattling rods in my last builds, which used double action, despite a snug fit and adding spots of silicone to the channel before installing the rod. Another reason is this is a longer scale bass (36" scale) and all of the double action rods available for bass are no longer than 24 inches.

I also did a lot of research and got some information from other builders that use this style of truss rod. I already can see a big difference with this build: When I knock on the neck blank, I do not hear the rod rattle.
 
I've only used DA rods in builds, but have never had a rattle. I did have one bass where there was rattle if I rapped on the back of the neck. On that build the truss rod wasn't doing anything as the bow on the neck was perfect without any tension. I tightened that rod just enough so it had tension on it, the rattle went away without impacting the bow on the neck. I made it just tight enough to stop the rattle. I'm interested to hear more about this as I wonder if it's a problem waiting to happen on my builds.
 
I've only used DA rods in builds, but have never had a rattle. I did have one bass where there was rattle if I rapped on the back of the neck. On that build the truss rod wasn't doing anything as the bow on the neck was perfect without any tension. I tightened that rod just enough so it had tension on it, the rattle went away without impacting the bow on the neck. I made it just tight enough to stop the rattle. I'm interested to hear more about this as I wonder if it's a problem waiting to happen on my builds.
That's what I do as well and the rattle is cured.

@JAKeverline I know it's only an inch, but Allparts sells a 25" d/a trussrod that I've used successfully... :)
 
Same here. My builds seem to come out to where the neck relief is where it should be before any tension is put on the rod. I had to tighten them little by little until the rattling stopped. For this build, rather than leveling the neck with a slack truss rod, I'm going to tighten the rod to induce some backbow, then sand it level. This will create a forward bow when the truss rod is slack. Fretting will likely force the neck back a little, but not into a backbow, as would happen if I leveled it with the truss rod slack.
 
To make the ebony heel block, which is basically a wedge that tapers from 1/16" to 1/4" over 6" length, I decided to cut it by hand rather than risk destroying a bandsaw blade. This chunk of ebony is 3 1/4" square by 6 1/2" long.

IMG_2350.jpg

IMG_2354.jpg

IMG_2356.jpg

IMG_2357.jpg

IMG_2359.jpg


I level sanded each side after cutting the heel block.

The fingerboard glue-up went smoothly. Since the fingerboard is ebony, I level sanded the side I was going to glue, wiped with acetone to remove oils, which turned the paper towel a yellow-brown color, then once the acetone evaporated, I immediately applied glue and clamped the fingerboard to the neck using the back of my router table, and two boards that were planed square. The dots on the fingerboard are 3/16" dowel pins, to keep the fingerboard from sliding during glue-up. The dots in the middle are right where the 12th fret inlay will go, and will thus be covered.

IMG_2347.jpg

IMG_2363.jpg
 
Significant progress has been made with the neck during the last several days. Today, I felt in a groove in the shop and everything seemed to flow smoothly.:)

Cutting the radius presented one challenge. Since this is a 36" scale neck, I realized that I did not have quite enough length to cut all the way down with my radius jig. I had to unclamp the neck from the jig, remove the clamp on the nut end, slide the neck down, then use regular clamps to hold the neck down while I cut the last bit.
IMG_2365.jpg


Sanding with the radius block (12")
IMG_2368.jpg

IMG_2369.jpg

IMG_2371.jpg


To lay out the fret positions, I used a magnifier, a precision ruler, and an engineer's mechanical pencil.
IMG_2372.jpg

IMG_2373.jpg


Cutting the fret slots:
IMG_2380.jpg

IMG_2383.jpg

IMG_2384.jpg


The taper on the back of the neck was then layed out and cut on the bandsaw. The taper runs parallel with the truss rod. When the neck is finished, the thickness between the truss rod and the back surface of the neck will be 1/8" along the whole length.

Last week, I had noticed that the ebony heel block began to cup. I immediately clamped it between two level sanded pieces of 2x4. Fortunately when I removed it for gluing to the neck, the heel block had mostly straightened out. I glued the concave side of the heel block to the neck, thinking the moisture in the glue will cause that side to expand and flatten out. It worked!
IMG_2386.jpg


After cutting the side tapers, jointing, then sanding smooth, I glued the scarf joint. I located the aligning pins in the middle instead of the sides like I did previously. On my last build, one of the alignment pins showed up when carving the back of the neck to headstock transition.
IMG_2388.jpg


Sides were then trimmed and sanded even with the neck taper in praparation for gluing the headstock "ears".
IMG_2393.jpg

IMG_2394.jpg


To finish off the day, I level sanded the front of the body with the following setup:
IMG_2390.jpg


The figure is going to look stunning when I do the Tru-oil finish!
IMG_2396.jpg