Low End PJ Build (With Pics!) Complete with Questionable Squier DNA

Derry Murbles

Supporting Member
Nov 1, 2015
930
1,775
5,156
Burbank, CA
Well I've decided to scratch an itch that seems to hit me every single time I touch/tweak any of my gear... the itch to build (I guess assemble is a more accurate term here). The last was my take on a 58 Fender P (in my sig) and this time around, I'm going for basically a Squier PJ.

What I Have (Am Using)
2001 Squier Affinity P bass body- This is the original body from the first bass I ever owned. This body has been "refinished" three times, has had been on the road with me down the east coast while loaded with an 08 Fender P neck and a Dimarzio Split P, has taken over a decade of abuse, and yet by some miracle is still with us. I'd like to pay it its due respect and get it back to working order, and if it looks good, then bonus points for me!

I'd like to let the body itself shine this time around in all it's mediocre glory, instead of caking it up with improperly applied paint using a paint brush or rattle can. The grain isn't particularly stunning, it's a multi piece body, and there are imperfections in abundance but this isn't a show bass. I just feel like putting together a respectable, functional and sonically pleasing instrument.

You may have noticed the title says PJ, but the body is a P body. That means I have to put in a new slot for a J pickup. This is both an exciting opportunity to learn and a terrifying proposition:

For one.... or three, I've no experience routing body cavities, I don't have a plunge router, and only have a hand router to work with at the moment. On top of that, I'm an abysmal decision maker, and I'm sure there is some subjectivity to placement of the j pickup. 60's position? 70's? I don't even know if that debate is applicable in a PJ set up but I'd certainly imagine the tonal variance between the positioning options exists. More to come on that later.

Neck- TBD; None at the moment. I'm open to pretty much anything- I wouldn't mind buying a Squier P or Jazz neck to keep the bass semi authentic, but I also wouldn't be opposed to snagging up something of higher quality. And for those who are cringing- No I do not plan to slap a Fender neck or decal on the bass and parade it around as a Fender.

Hardware- I'm currently in possession of a mixed bag of Squier and Fender parts. I have a Fender MIM standard bridge as well as a black Badass 2 bridge with a fresh set of unfiled saddles. I'll probably use the Badass 2 for aesthetic purposes.

Electronics- This is up in the air as well. I snagged a Squier PJ wiring set from TB for a song (thanks @stshipley !!!) so I don't need to purchase anything additional to be up and running. I may explore the idea of doing an active preamp, upgraded pots/wiring etc, but for now I want to get everything set up and see how it sounds as it sits. If this whole Squier set up sounds good, I'll be less motivated to make upgrades.

The Look:
I've been pining to do some kind of oil finish lately. I'd like to go with a slightly darker hue/stain, however while wandering around Lowe's yesterday a colored stain caught my eye. I'm thinking since I have a "traditional" finish in my sunburst P, maybe a cool looking color stain is in line? I love not having a plan!

Depending on the look I go with (will almost certainly be a black PG), I will decide the neck/fretboard combo.

Anywho, I'll post pictures, concerns, questions, and my journey along in separate posts so that this one isn't too messy. Thanks in advance for any comments, criticisms, help, and thoughts!

Happy Jamming!

Her before surgery:
IMG_1077.JPG
IMG_1078.JPG
IMG_1079.JPG
IMG_1080.JPG
 
Last edited:
I decided that I wasn't about to sand off the decade's worth of poorly executed paint jobs. Long story short, I had a white base layer of too thick interior furniture paint, beneath a black rattle can base that I had to lay down for the color changing blue and purple paint.... and then there's the blue and purple paint. Add too few layers of some shoddily shot clear coat and boom! This is what you end up with:

IMG_1100.JPG
IMG_1103.JPG


I decided to go with the path of least resistance and strip instead, using some pretty rudimentary software and hardware:

IMG_1105.JPG


I learned pretty quick that when you have that much paint to get through, that the dinky plastic scrapers will only take you so far... more on that later. Pouring the stripper in the bucket, it reminded me of that nasty looking lobster sauce you get from some Chinese restaurants, but I think the stripper smelled more appetizing:

IMG_1107.JPG


In any case, I applied a thick goopy layer and let it sit to do its magic- It started to do its thing almost immediately:

IMG_1115.JPG
IMG_1116.JPG


After about 15 minutes I dove in. I was pretty impressed with how well the stuff worked. It took a few hours of reapplications and scraping with the flimsy, worthless scraper, but I was making enough progress to motivate me to keep going:

IMG_1130.JPG
IMG_1133.JPG


Now I'm not sure if it was before I got to working on the back of the body, but I wised up with my hardware:

IMG_1148.JPG
IMG_1133.JPG
IMG_1137.JPG
IMG_1139.JPG


More in the next post....
 
Last edited:
As I continued on my path of destruction, I started to discover all of the spots I decided to fill, all of the areas where I crudely and haphazardly took a screw driver to the lacquer/shellac/damn-near-3MM-thick-layer-of-sealer that lay under the stock paint. In a younger day, I thought it wise to just try to dig it out with brute force... and then I realized how in over my head I was, so I put the kabash on that and began to backpedal immediately.

Enough reminiscence of a simpler (stupider) time... back to today-

Once I got in the groove things were moving along:

IMG_1143.JPG
IMG_1145.JPG
IMG_1150.JPG


As the light at the end of the stripping tunnel was fast approaching, I also discovered how easy the small annoying patches of paint were to remove once I implemented a scouring/finishing pad with some mineral spirits:

IMG_1153.JPG


I'm thinking I'm going to end up just taking this filler out because I only used it to try and even out the surface of the sealant layer (whatever it is), and since I plan to stain, that layer's coming off anyway.

IMG_1154.JPG


I started to inspect the body piece joints to see if I had anything to be concerned about... I had no reason to believe I would, but knowing what this body has been through it certainly wouldn't surprise me.

Do any of these joints look questionable? I can't imagine the remaining finish layer is doing anything to add structural rigidity to the body joints, but to be frank I don't really know what I'm looking at in this regard, so please feel free to paint out any red flags or potential downstream issues:

IMG_1159.JPG

IMG_1162.JPG
IMG_1163.JPG
IMG_1164.JPG
IMG_1166.JPG


And here is the date stamp from the neck pocket- June 10 2001 which makes sense, I got the bass for Christmas in 2001:

IMG_1165.JPG


So that's where I am at the moment. I'm currently contemplating the next path of least resistance with regard to this stubborn shallac/lauquer stuff. I'm sure sanding would be tolerable at this point with a palm sander so I'll have to decide what to do.
 
Last edited:
  • Like
Reactions: pjbassist
Is that a crack in the neck pocket along the 2 bass side screws?

So there are two things going on there, 1) The bass side neck screw holes are right along one of the body seams (which seems like that shouldn't have been manufactured that way, but I'm not an expert) so there is a seam there, and 2) There is a crack in the sealant layer, which is showing as that real dark crooked line. The finish crack does not appear to go into the body itself. I've been preparing for a discovery like that though, given the abuse this guitar has taken over the years.
 
Small update:

So I've decided that I'm going to sand this girl down myself. I bounced around the idea of buying a new body from a few different outlets (Hefner, USACG, etc) so as to avoid the sanding hassle and j pickup routing, but I think I'm going to go for it myself. It'll be more fun doing these things and learning the process along the way. If things go awry and I get frustrated, I'll open my wallet accordingly to get the project done.

I just received my stain from Crimson Guitars, along with a vial of their purple dye. I plan to mix a bit of the purple dye with the black stain to get a nice transparent black finish with a sexy hue of purple to it... something along the lines of below:

cfd71ecfc3e591a6c7a01c55e191fd8d--fender-custom-shop-bass-guitars.jpg


I actually adore this whole visual setup with the black hardware and maple neck. I'll probably go for a similar aesthetic with mine.

I'm looking forward to getting the sanding started this week so I can use this stuff ASAP!

IMG_1243.JPG.jpeg
 
  • Like
Reactions: pjbassist
Pre work update:

In receiving the stain from Crimson Guitars, I was feeling compelled to get this body down to bare wood in a hurry. I ended up running to Lowe's on impulse to grab a few respirators and some sandpaper yesterday afternoon, pulled out the palm sander and took to it.

Since this bout of sanding was on impulse I didn't get any progress shots, however it was fun to see the natural (and much lighter) color of the wood start to show as I got through the finish. It took me about 45 minutes to get the front of the body as it is imaged below. You can see I still have to do the edges and sides (which I'm aware may need to be done by hand). The grain isn't the ugliest thing I've seen in my life, but it's also not exactly inspiring. I take solace in the fact that a good portion of the body joints will be covered with the PG, unfortunately not the furthers treble side joint... blech!

Overall I was impressed with how quickly and easily I got through it. I'm really looking forward to sanding the rest of the body to bare wood and getting started on pickup cavity routing... which I still need to figure out how I'm going to do that :hyper:

IMG_1245.JPG.jpeg
IMG_1246.JPG.jpeg
IMG_1247.JPG.jpeg
IMG_1248.JPG.jpeg
IMG_1249.JPG.jpeg
 
  • Like
Reactions: pjbassist
Nice project. Have you considered a P+MM instead of just a PJ?

Thanks so much for the kind words!

You know, I've seen this setup before, however I had not really considered it until you brought it up. But as I think about it, I did absolutely love the flavors that I got out of my old Bongo HS. I've read about the benefits of adding a humbucker to the equation with regard to noise (however I think you'd still get some noise from the single coil P pickup regardless). Long story short, perhaps I ought to investigate this option some more.

I did already buy a complete Squier PJ wiring setup that I was planning on using to keep the bass closer to its Squier roots for better or worse, (however pots, cap, wiring would all end up getting swapped out) but I'm absolutely open to changing things up. Do you have any experience with either the PJ or PMM set up? Any preference for one over t'other?

Or this...which I finished a couple weeks ago:
View attachment 2563764

I did think about doing a PP (heh heh... PP... :facepalm:) set up, but I just don't like the aesthetics of it. I don't know why but I like the bridge pickup being an even/flat look as opposed to the staggered halves of a p pickup. The look of it irks me to the point that even if it was the most versatile, best sounding pickup configuration on earth and made me 40 times better at playing bass, I'd likely still pass because I don't like the looks. I am what I am!

How does that girl sound btw (digging that color HARD)? Any thoughts on how the tones/colors you get out of a double p set differ from a single p (or even better, a sound clip!? :angel:) Or further how it might differ from a PJ/PMM? I'm going to do some research on these and I'm sure there are vids out there, but I was curious as to your personal experience.
My very green guess would be the PJ and PMM would sound closer to one another with a PP setup a bit warmer, but I've never played a PP set up. Does that second p add the same growl or aggressiveness that I believe the J or MM pick up adds?

Also, I'm toying around with different wiring/knob configs between VVT/VTB/etc- I also like the idea of coil tapping, but I'm very novice at electronics and wiring, so I have some serious homework to do in that department.
 
  • Like
Reactions: pjbassist
Thanks so much for the kind words!

You know, I've seen this setup before, however I had not really considered it until you brought it up. But as I think about it, I did absolutely love the flavors that I got out of my old Bongo HS. I've read about the benefits of adding a humbucker to the equation with regard to noise (however I think you'd still get some noise from the single coil P pickup regardless). Long story short, perhaps I ought to investigate this option some more.

I did already buy a complete Squier PJ wiring setup that I was planning on using to keep the bass closer to its Squier roots for better or worse, (however pots, cap, wiring would all end up getting swapped out) but I'm absolutely open to changing things up. Do you have any experience with either the PJ or PMM set up? Any preference for one over t'other?

Yep, I built a P+MM earlier this year: NBD - That Ash tho

Sounds great and I can get a lot of tonal variety out of it. I wired with a blend knob and Series/Single/Parallel switch (had to make my own wiring diagram here: Slow build Super PJ)

Actually, the P pickup is a humbucker and the MM is a humbucker. The only setting I get a 60 cycle hum in is the single coil setting on the MM (just like if I solo'd the bridge pickup on my jazz. Silent other than that on setting
 
@WhtMtnGrv Thanks for the kind words, I think the color is Capri Orange or something similar to it. I dig the color, but bought the body here on TB b/c it was routed Double P. My avatar is my #1 that I've had 25+ years, so I am used to the look of the configuration.

I built a P/J prior to this one to be my back up to my#1:20160918_115251.jpg
and although it sounded great, it didn't have the same balls behind it as my avatar bass, so I turned it into my Fretless when I built the "Creamsicle Of Thunder". Which sounds the most like my #1 as any other bass I have had. Punchy and authoritative with a strong low end. Imagine an active P Bass X 2...which in reality is what they are!

I have never owned a MM, but had a G&L L-2000 for many years that came close. I think the suggestion by @brianmharrison is a great one, but I like things that are different than the pack and unique in their look and sound. A P/J is a great option too, I wanted to try it out and am glad I did!

I appreciate all the effort you're putting into this build, its great fun to follow! Good luck, I hope I answered your questions!
 
Yep, I built a P+MM earlier this year: NBD - That Ash tho

Sounds great and I can get a lot of tonal variety out of it. I wired with a blend knob and Series/Single/Parallel switch (had to make my own wiring diagram here: Slow build Super PJ)

Actually, the P pickup is a humbucker and the MM is a humbucker. The only setting I get a 60 cycle hum in is the single coil setting on the MM (just like if I solo'd the bridge pickup on my jazz. Silent other than that on setting

I think our discussion has put the P+MM up for serious consideration. I've watched a few videos of this set up and I like that there are several wiring options from which I can choose. I'm also pining for an active set up (active preamp, rather) which would only add more tonal variety. I was seriously digging the preamp in the Sires (Used to have a V7), particularly the mid frequency sweep... one more thing to consider.

@WhtMtnGrv Thanks for the kind words, I think the color is Capri Orange or something similar to it. I dig the color, but bought the body here on TB b/c it was routed Double P. My avatar is my #1 that I've had 25+ years, so I am used to the look of the configuration.

I built a P/J prior to this one to be my back up to my#1:View attachment 2590074
and although it sounded great, it didn't have the same balls behind it as my avatar bass, so I turned it into my Fretless when I built the "Creamsicle Of Thunder". Which sounds the most like my #1 as any other bass I have had. Punchy and authoritative with a strong low end. Imagine an active P Bass X 2...which in reality is what they are!

I have never owned a MM, but had a G&L L-2000 for many years that came close. I think the suggestion by @brianmharrison is a great one, but I like things that are different than the pack and unique in their look and sound. A P/J is a great option too, I wanted to try it out and am glad I did!

I appreciate all the effort you're putting into this build, its great fun to follow! Good luck, I hope I answered your questions!

I'm glad someone else is getting some enjoyment out of the project! Speaking of different, this idea just popped into my head- I wonder what the practicality would be of a J+P+MM set up. I'd really like to do a P+J set up, but the P+MM is tempting and I'm thinking maybe I'll have my cake and eat it too?

In any case, here are a few more pictures of the body after getting some more sanding down before our 80th annual family reunion in Geneva NY. SIDE NOTE- On the way home from NY, I drove right past the Hipshot office in Interlaken (I think the actual town is Covert, but Interlaken is the mailing address). Come to find out I've been driving past the place for the past ~30 years and never noticed/realized! I thought it was pretty neat; I should have stopped in for some hardware for the project!


Here is the front again... You can see where I dug in with the palm sander a bit much on the wrist-rest contour. I know it's not proper technique to use a flat palm sander on those contours, but I was feeling lazy and will have to smooth it over by hand once I get the rest of the finish off.

IMG_1254.JPG.jpeg


Annnnnnd the back. I'm so glad I decided to sand this crap off. It was. damned. thick. Once again, not the ugliest grain I've ever seen, but it is a 4 piece body... so it's inherently ugly in that regard.

IMG_1255.JPG.jpeg


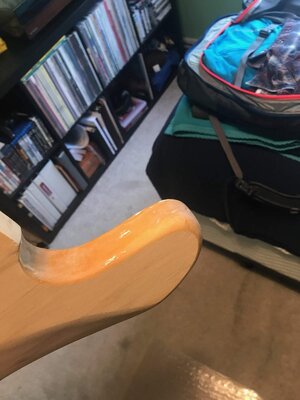
In my aforementioned laziness, I decided to sand some of the edges too. More hand sanding will be required to smooth out my mess here but I'm not heartbroken over it. It could be ignorance, but I don't mind the idea of taking off some material. The body is on the heavier side as far as I understand at well over five pounds, so a few ounces of weight removed at the hand of overzealous sanding doesn't sound like a disaster.

IMG_1256.JPG.jpeg


IMG_1259.JPG.jpeg


I should be able to finish this sanding by the weekend or at least come close, then it'll be time to decide and figure out the pickup config and subsequent routing. I can't wait to get this thing going!
 

Attachments

  • IMG_1257.JPG.jpeg
    IMG_1257.JPG.jpeg
    111.5 KB · Views: 44
  • IMG_1258.JPG.jpeg
    IMG_1258.JPG.jpeg
    102.6 KB · Views: 47
Last edited:
  • Like
Reactions: eaglemachine
UPDATE- My apologies for any spelling or grammar errors- I'm in a rush to post this before band practice and wanted to get it posted before I left.

I've only one functioning bass at the moment, and with my band's first show rapidly approaching on 10/9 I'd REALLY like to get this thing functional by then so that I can have a backup just in case. This has motivated me to get myself in gear. I've got three weeks....

Anywho- After a significant respite from working on this thing due to schedule, life, and laziness, I got back into it for a bit this past weekend and tonight. I was able to finally get all of the finish off and the body down to bare wood. This step is especially pleasurable for me as this is a step about 10 years in the making. I've put off this project specifically due to having to get the body to bare wood and not feeling like grinding (metaphorically) through it.

However, with some more 60 grit and elbow grease, she's finally naked. I forgot to snap some pictures but use your imagination- something tells me most of you have seen a stripped body before :smug:

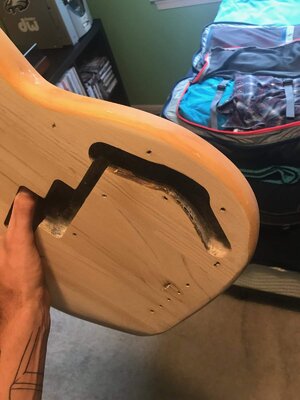
Anyway, I decided the next step was to get the pickup cavity routed. I didn't feel like waiting for a template or paying for expedited shipping, so I went at this step knowing full well what the repercussions could be should it go awry. Luckily I had my father there to assist since I've never used a router, and he's got 30+ years of carpentry/construction experience.

I arbitrarily decided on pickup location after reading myself silly on 70's vs 60's location- I understand the potential for sonic differences between the two, but this is a low end project- I can always swap pickups/add a preamp to get the tone/sound where I want it. The pickup is somewhere between the 70's and 60's position- it's aesthetically pleasing, and I don't really care that much about this detail to be honest. If I get that "mid honk" I've read about I can always swap the coils of the p pickup if it comes to that.

IMG_1327.JPG.jpeg


IMG_1328.JPG.jpeg


IMG_1329.JPG.jpeg


I haphazardly measured several times, found the center line, marked out the location, and took to the garage. For having thrown together the rig to keep the routing lines even in about 2 minutes, I think it came out pretty alright. I know it could have gone WAY worse. The cutouts for the screw-wings are a bit off kilter, but I can also balance that out if I so desire. I think it's a pretty neat and even rout considering it was done basically by hand with no template. What can I say- I'm a gamblin' man.

IMG_1330.JPG.jpeg


After most of the routing was done. You can see a spot where I went just a touch too far on the treble side:

IMG_1331.JPG.jpeg


IMG_1332.JPG.jpeg


Keep in mind- I'm fully aware that this is NOT the correct method of doing this. I'm in a hurry and my main objective here is to learn and have fun while modifying/building a reliable, sonically pleasing bass. I'm playing with house money- mistakes are low impact and I'm fully prepared to just buy a PJ body if I need to... but that's no fun!

Here are a few pics with the pg, bridge and pickups mocked up. I think it looks pretty rad at the moment. The jazz cavity isn't perfect, but within a couple millimeters to my eye. From far away will anyone notice? Highly unlikely. And functionally, it won't affect the playability or sound (to my knowledge).

IMG_1333.JPG.jpeg


IMG_1334.JPG.jpeg


IMG_1335.JPG.jpeg


You can also see above where there is a little chunk taken out of the top of the body- I foolishly lifted the router out of the cavity before it stopped rotating.... D'OH!

Overall, given how I went about this step, I'd say casualties were minimal. Next step will be to drill the hole for the pickup wires into the main cavity, sand for finishing and start on finishing. Oh, and buy a neck :eek:

EDIT/NOTE- This is not the PG I'm using- It's an old one I have laying around just to mock up. The cutouts around the p pickup are horrendous.
 
Pretty good for being sorta freehand. I think I might drill for the pickup "ears" before routing next time.
Thanks for the suggestion! That makes sense as I think about it. I'll have to do that next time- and there will be a next time!

Another Update:

The black wire/lead coming off the jazz pickup ripped off today when I accidentally dropped the pickup on the carpet. There were a few broken strands in the wire to begin with, and the drop just sealed its fate. I'm no stranger to a soldering iron, so I decided I was going to pop the pickup out of the cover, and either reattach the wire, or get some of the push-back wire and use that. Either way, I'm soldering a lead back onto the terminal. I figured if I messed up the pickup irreparably, a replacement single jazz or even matching set would not be expensive to replace:

IMG_1338.JPG.jpeg


I started to work the cover loose from the bobbin, but it took some real gusto. I used a little Xacto type knife/blade to work around the sides of the bobbin, but the adhesive would not relent.

I was starting to get impatient, so in my novicehood (and since I'm working and I'm not really focusing on anything 100%), I took a pair of channel locks to the magnet at the base of the pickup to attain some leverage in pulling off the cover. I actually did successfully and gently lock onto the the middle of magnet without damaging it TOO bad, and got one side of the cover separated from the top of the bobbin.

Well in working the other side, I grabbed too close to the edge of the magnet and cckkkrrrsshhhc:

IMG_1336.JPG.jpeg


IMG_1337.JPG.jpeg


So, yeah- that happened... $%&*

My question is, will this slight "rearrangement" of the bottom portion of the magnet cause a problem? I wouldn't be surprised if there was some effect on the signal strength or tone coming from the pickup since the magnetic field might be affected. I think? I don't know enough about electronics or magnetism to draw any semblance of an educated guess.

In case you're wondering why I even messed with the pickup cover instead of just resoldering- I know the coil wire is hair thin, and I wanted to ensure that in soldering on the new leads, the copper wire didn't separate from the terminal completely. I just know that I've I had gone ahead with the build and that had happened, I'd have ended up tearing my hair out troubleshooting before discovering the copper wire had come off, or just buying a new pickup altogether.

In any case, what say you collective TB knowledge base? Have I destroyed my cheap Squier J pickup? Should I use this foul-up as an excuse to go buy some Nordi/Bart/EMG/etc?

Thanks for any insight!

As an aside- I'm currently trying to figure out what direction I want to go in with the input jack mounting/PG/control setup.

I'm currently thinking about either a V/B/T, a V/T/3 Way switch set up a la Tony Franklin, or I've read about a start V/T V/T set up so each pickup has it's own independent volume and tone control. I like the idea of a master volume and only having to worry about one knob to go mute. I already have a traditional p bass, so it'd probably be a rarity that I'd be playing this PJ with the neck pick up solo'd- I would be more than likely be playing with both pickups at 100%, maybe with abut of the p rolled off.

I'd REALLY like to avoid having to drill for a side jack, but if I want 3 pots and an input jack on the PG I need a 4 hole PG (Or go with the Tony Franklin arrangement). The only stock Fender one I've found with 4 holes was the American Elite IIRC, and I'm not entirely certain it would fit the Squier body. Screw holes are not a concern because I'm going to fill/dowel all the current PG screw holes so as to be able to use any hole pattern required to get the controls set up to my liking

I'm abysmal at making decisions, so this choice is metaphorically keeping me up at night.
 
Well, the body is getting its first taste of stain tomorrow morning! I went out earlier tonight and picked up some of the Minwax pre stain conditioner (I accidentally bought the stuff for oil based stain- have to exchange tomorrow morning) and sanded the body from 180, to 220, to 320 for several hours tonight. There are a few weird spots that I'll take focused pictures of tomorrow that give me some concern with the way to wood is going to take the stain. Overall thought I don't think it looks half bad. The real story will be written once I actually stain it however.

I plan on using tissue paper to apply the stain and testing the hue on a scrap piece of course.

Also, I decided that I'm going to go with a master volume, master tone, and a three way switch. I've ordered all my hardware which should be here tomorrow, and the neck I ordered should be here next Thursday. I'm hoping that by then I'll have ordered and received PG and pots.
 
Last edited:
Happy Football Sunday Folks! (Go Birds!!!)

I have an update from yesterday after spending a few hours working on the bass. I have to say that after looking at it this morning, the thing doesn't look half bad. There are several spots around the edges, and of course the actual sides of the body where the wood slurped up the stain and it got DARK. I like the color I have though and even the variation of it gives it weathered kind of look.

I mixed 2 parts water, 1 part stain, and I started with 3 drops of purple dye. As I got down to about a third of the total mix left, I added another drop of the purple dye to give it some more of that hue.

Even though it's not totally uniform (and I've sanded through the stain in a couple spots as you can see), I actually like how it's coming out so far. I only put two relatively heavy coats on so far and sanded to 320 after each, so I plan to do put several more and see how it takes it. There isn't much grain for the extra coats to define or bring out, so in the interest of getting this thing done by 10/9 it may be better to just lay a few more on, get the color right, and get on to the topcoat.

Ok enough talk- some progress pics!

The pre stain conditioner I used. I initially bought a MUCH smaller can of the oil based stuff by accident Friday night- so my Saturday morning started with running to Lowe's to do a quick exchange. They didn't have the little cans of the water based conditioner, so I was forced to buy this huge can that will take me a decade to finish. Applied with the foam brush pictured. And there's the stain hiding in the back!

IMG_1356.JPG.jpeg


After applying the conditioner:

IMG_1354.JPG.jpeg


IMG_1357.JPG.jpeg


A little tester piece- I was only seeing how much thicker the coats got depending on how much I applied since I didn't condition this piece, nor is it alder.

IMG_1358.JPG.jpeg


IMG_1359.JPG.jpeg


This is the elixir after mixing. I used Crimson Guitars Transparent Black water based stain, and their purple dye

IMG_1360.JPG.jpeg


These are after I laid a good deal of stain into the body, but before sanding it back down. It wasn't totally dry either

IMG_1362.JPG.jpeg


IMG_1361.JPG.jpeg


And after the second coat, and corresponding sanding:

IMG_1363.JPG.jpeg
IMG_1364.JPG.jpeg


I think the back took the stain more evenly and looks better than the front...

IMG_1365.JPG.jpeg


Edges are dark but after hitting them hard with the sandpaper, they can be lightened up:

IMG_1366.JPG.jpeg


IMG_1367.JPG.jpeg


IMG_1369.JPG.jpeg
IMG_1368.JPG.jpeg


And just a little mock up... Tommy Likeyyyy

IMG_1370.JPG.jpeg


I'm thinking of going with the Minwax polycrylic to hopefully achieve a gloss finish. I think that will bring out the color. bit and give the bass a real sharp look. I'm going to try and put in some more time on the body tomorrow and see how much more I can get done.
 
  • Like
Reactions: Brio and pjbassist