Over a year and a half ago I started planning my ukulele bass project. After a short debate I decided it was a solid body bass that was my goal. Fretted or fretless was the next choice, I went for fretted to make playing easier.
I researched what was out there and decided a modern upright electric bass was the style I wanted. I had always planned on building it a removable floor stand for it.
The first thing I bought was a set of strings, total ca ft before the horse situation. I was in Reykjavik and saw some Kala basses in a music shop there and also saw a set of strings so I totally impulse purchased them.
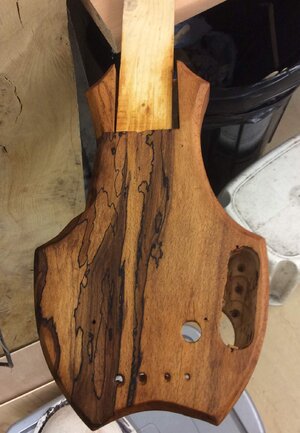
My wife bought a chunk of wild looking wood off eBay with an intention of making a gnarly looking shelf. I eventually stole that piece of wood which was targeted for the body. I drew up a full size plan of the body and neck, made a template and cut the body out on my hobby size bandsaw. I bought some neck stock and fretboard stock. Nest I went halves on a fret cutting jig with a friend and cut the 20" scale fretboard. I spent the next year building stock of part and other bits.
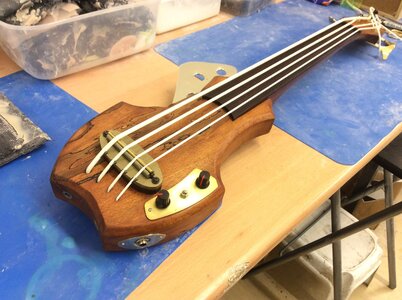
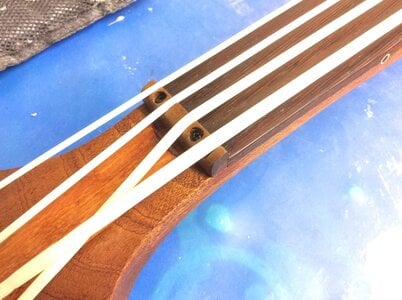
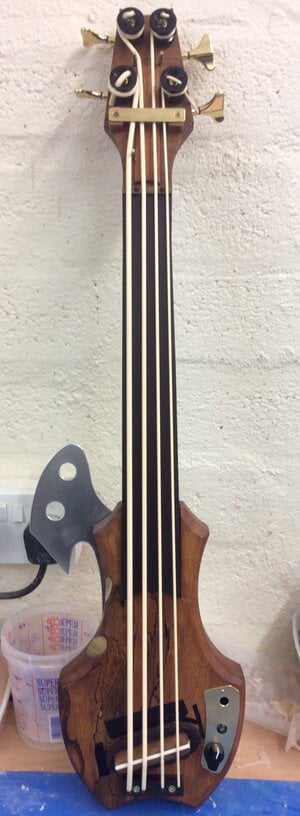
Finally the wood was cut roughly and I began shaping everything. I drilled out the internal cavities and finished them with a chisel. I cut plates from sheet brass. I made up the bridge and nut from hardwood. I screwed the nut into place in case I ever need to remove or adjust it. I bout some bass tuners and glued on the fretboard and slapped everything together to check the basics. I can't write the words I used for about 2 hours when I realized I glued n the fretboard in the wrong position...no detaching it, no recutting...it was screwed. So....fretless it it! Onto the bed sander with it. Ta Da, fret lines gone! Sigh.
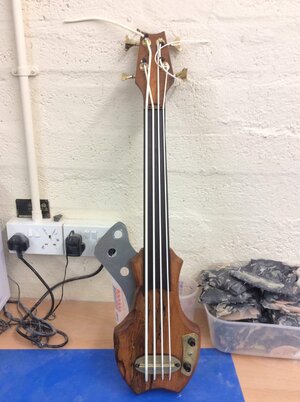
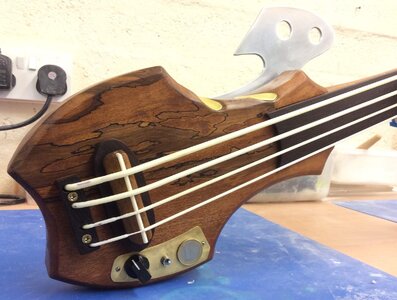
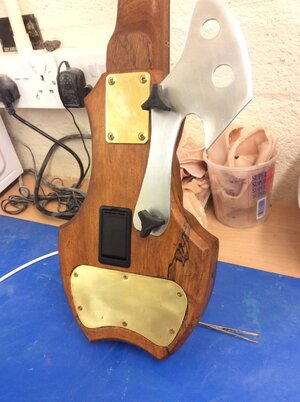
I filled some white styrene tubing with black polyurethane resin and when set I chopped the tube up and fitted those as side markers. I cut a bout support out of 3mm aluminum plate on my trusty bandsaw and fitted it via thumbscrews. I wanted to play it upright so a bit of doctoring of an adjustable walking stick intended for the charity shop sorted that. The wooden block that it is fitted to bolts to the bottom of the solid body.
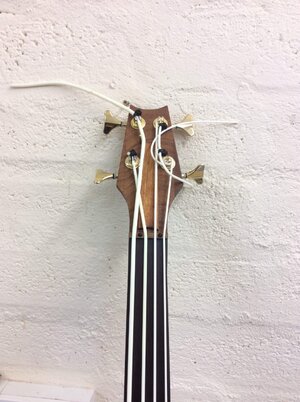
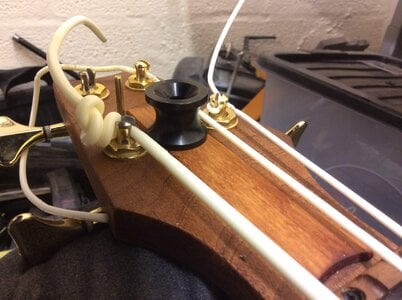
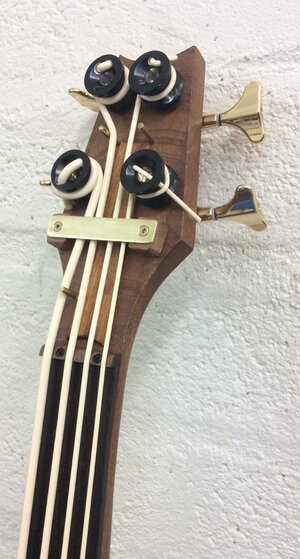
I rethought the tuners and decided to reproduce the Ashbory style machine heads. The straight cut edges of the standard bass tuners seemed too harsh for the elastomer strings. I found some Wilkinson bass tuners with a straight 8.3mm shaft and purchased some aluminum paddock stand bobbins from a motorcycle shop. A bit more work with a drill and some taps and I had far more suitable tuning spools for those elastomer strings.
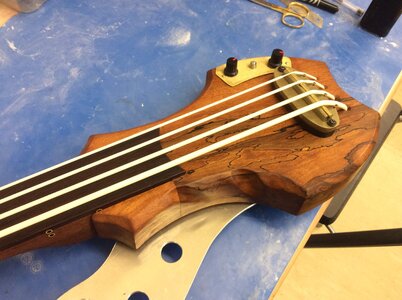
I used an Artec bass piezo rod under the castellated bone saddle I cut from a large acoustic part. After a lot of less than satisfactory experimenting with pre amps and boosts I decided to fit a Super Hard On clone boost internally. The whole lot is powered up when the lead is plugged into the jack. I noticed a grounding issue, I was getting a low level buzz When I was in contact with any of the metal parts it stopped. That's fine when you normally play and fret with metal strings but this bass was going to use plastic ones. I decided earthed brass contact plates in the thumb rests could be the answer...and they were. It took a bit of contortion to fit them with scissors and drill bits.
A bit of wood stain and some wax and the job was done. I tried Thundergut strings first but found them a bit too rubbery. I then tried some Thunder reds...much better.
Now I want to build a 3/4 size acoustic upright based upon a classic upright bass so I can do some proper slap bass and get that rockabilly sound on.
Does anyone know of a good place to start such a build? Plans, measurements, good U.K. Source of parts? A flat body is fine for my needs, doesn't have to be violin shaped, I don't have the tools or skills for a complex body shape but I really want that classic sound you get from that size, scale and string set up.
Attachments
-
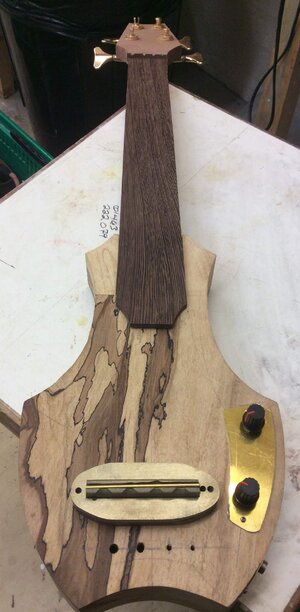 IMG_1494.JPG227.1 KB · Views: 116
 -
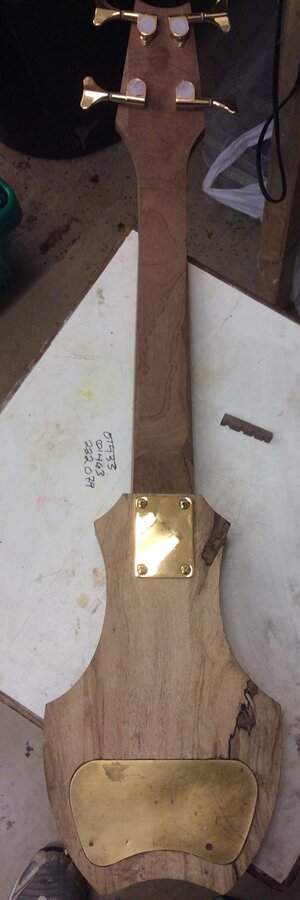 IMG_1495.JPG135.5 KB · Views: 115
 -
 IMG_1546.JPG148.2 KB · Views: 122
 -
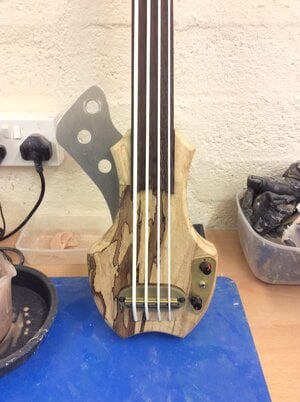 IMG_1557.JPG309.8 KB · Views: 117
 -
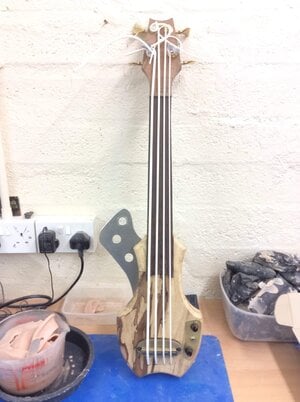 IMG_1558.JPG293.9 KB · Views: 114
 -
 IMG_1561.JPG213.9 KB · Views: 112
 -
 IMG_1566.JPG355.7 KB · Views: 117
 -
 IMG_1567.JPG335 KB · Views: 120
 -
 IMG_1570.JPG358.5 KB · Views: 139
 -
 IMG_1571.JPG386.3 KB · Views: 120
 -
 IMG_1573.JPG342.7 KB · Views: 126
 -
 IMG_1594.JPG310.9 KB · Views: 113
 -
 IMG_1604.JPG286.8 KB · Views: 121
 -
 IMG_1633.JPG202.3 KB · Views: 139
 -
 IMG_1634.JPG181.6 KB · Views: 122
 -
 IMG_1595.JPG109.7 KB · Views: 117
 -
 IMG_1598.JPG294.5 KB · Views: 116