First Commission Build - Is A Super-Tele A Thing?

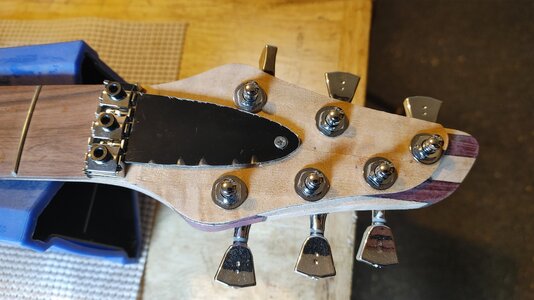
I think we're gonna be fine here. Got the holes drilled thru the veneer layers and re-punched that one tuner hole that was causing all this conflict in the first place. Relocated it just enough to clear, yet still cover the plug from the back side, so I don't need to veneer the back. Short of someone pulling these tuners off, they'll never see it, and I just can't see a situation where they would want to pull these tuners off. So here's where I am after my recovery program -
20241030_141238_HDR.jpg 20241030_141223.jpg
Still left with that tear-out in the center, but I'll either cover it with my logo or a truss rod access cover anyways, so I'm not gonna sweat that.
As you can see, the D string tuner washer is right at the edge where that other small tear-out is, so I may just leave it and do my best not to point it out to anyone and hope they never notice. I'm sure it'll get rounded over a bit during final sanding and maybe it ends up going away.

Now I wish I could have moved the B string tuner towards the nut a tiny bit. I'll probably make that adjustment in my template. With the G string tuner moved forward, that spacing is off now. Another thing I need to try not to point out and just hope nobody but me cares. But these are the details that I hyper-focus on. :confused:
You can draw it all out in CAD all you want, but once you start assembling it you find all the realities of the design. :facepalm:
I'm not mad at it, for sure. I really do like the way the headstock is turning out.

I did notice that the nut shelf is now a tiny bit longer than I anticipated and the nut doesn't fully cover it now. Funny how these things work out, huh? First it was a teeny bit too short. Now it's the top layer of veneer too long. So now I need to look into covering the ends of those layers of veneer. But I'm gonna wait until I figure out my nut height anyways. It's a Floyd Rose locking nut so you have to adjust string height with shims anyways. So that is on hold for the time being.
I think I can get back to mocking up the rest of the hardware and see what else I can mess up! 🤣
 
Got more veneer to re-lay it? :D I always clamp those buggahs with wax or parchment paper...
I do have a bunch of scraps that would work. But this one was the best color match after applying some DNA to it and the body top. It's still a bit off, but it's close enough that I think it'll work from 21 frets away. 🤣

I did use parchment when I glued it. It was the double-sided tape on the routing template that yanked it off. 😒
 
  • Like
Reactions: Beej
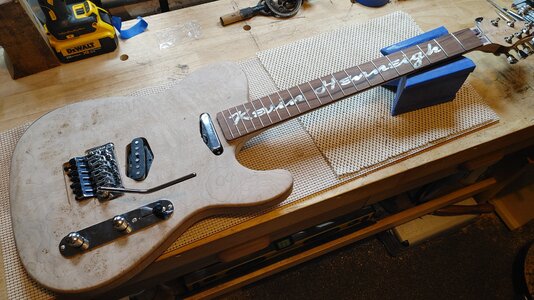
Starting to get all this hardware mocked up...
20241030_195406.jpg
Yeah, I ain't mad at it. :cool:

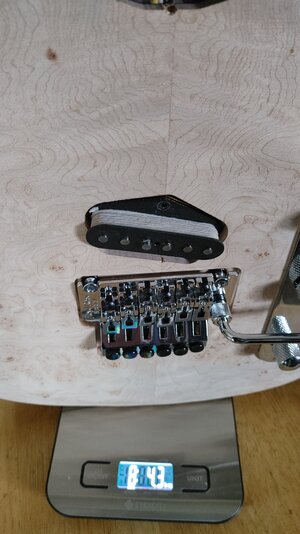
So the bridge pup isn't mounted yet. It came with the typical machine screws to mount it to the bridge plate, but we're not doing that here. So I need to get some wood screws to mount it to the body. The eagle-eyed among you will notice I also haven't mounted the nut yet. I missed on the first hole I drilled so I had to plug it with a toothpick and we'll try again tomorrow. I'm getting really good at drilling holes in the wrong spot. 😒 :confused:
I also had to swap out the trem block to a 32mm block because we're in that thinline Tele realm here. The stock 38mm block was too tall, but I had seen that coming so I had already acquired one. See, I can plan properly...sometimes.

Anyways, this thing is starting to look like a guitar! I'd love to get that nut mounted so I can blow it all apart and start the endless sanding. I'm gonna try to push to have this thing done before Christmas. Would be a pretty cool thing for him to be able to play it then. So that's the goal, now I need to get after it! 😧
 
Starting to get all this hardware mocked up...
View attachment 7066079
Yeah, I ain't mad at it. :cool:

So the bridge pup isn't mounted yet. It came with the typical machine screws to mount it to the bridge plate, but we're not doing that here. So I need to get some wood screws to mount it to the body. The eagle-eyed among you will notice I also haven't mounted the nut yet. I missed on the first hole I drilled so I had to plug it with a toothpick and we'll try again tomorrow. I'm getting really good at drilling holes in the wrong spot. 😒 :confused:
I also had to swap out the trem block to a 32mm block because we're in that thinline Tele realm here. The stock 38mm block was too tall, but I had seen that coming so I had already acquired one. See, I can plan properly...sometimes.

Anyways, this thing is starting to look like a guitar! I'd love to get that nut mounted so I can blow it all apart and start the endless sanding. I'm gonna try to push to have this thing done before Christmas. Would be a pretty cool thing for him to be able to play it then. So that's the goal, now I need to get after it! 😧
That's looking pretty sweet, my man!
 
  • Like
Reactions: TerribleTim68
Couple more updates as I try to get everything mocked up. It dawned on me that I needed a truss rod cover as well as a back cavity cover.
Luckily I had a sheet of black plastic pick guard material laying around from a previous project several years ago. But, might as well make templates for those because I'll probably need them again at some point in the future, right?
Pretty typical process. For the truss rod cover I used a piece of paper, cut to the shape/size I was happy with and then transferred that shape to the pick guard material, cut out on band saw leaving a bit extra and then sanded to final size on the disk sander (one of my lathes has a little 8" disk sander on the back side of the headstock, I just leave it there all the time).
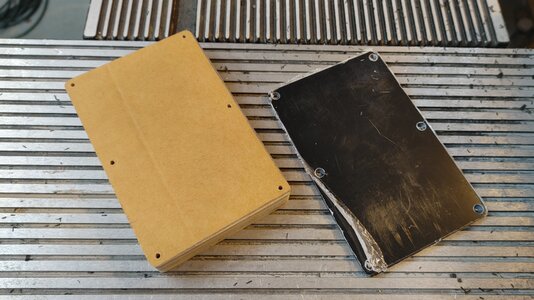
For the back cavity cover, I went and grabbed this super cheap Ibanez Gem knock-off that I picked up for $40 a few years ago, pulled the back cavity cover off of it and used that to make a template. :cool:
Here's a shot of my new template and the cover I made using said template -
20241104_212504_HDR.jpg
Double sided tape and a router table, easy peasy.
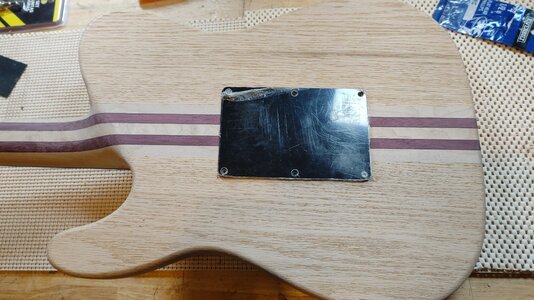
Here it is installed on said guitar back -
20241104_213011.jpg
That'll work! :cool:

As for the truss rod cover, I made sure it covered that tear out I had on the veneer too. Looks good to me. -
20241104_204925.jpg
I may ask my buddy with the Glowforge to engrave it, we'll see. I kinda want to put my logo on it, and I really don't wanna try to inlay it somewhere.

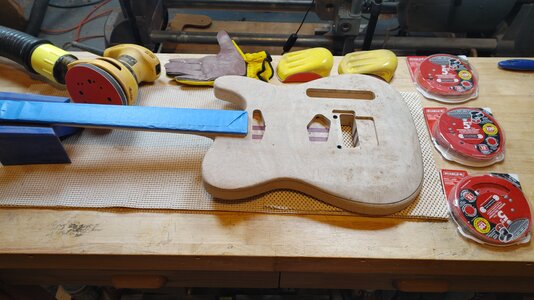
Okay, I think I've got everything mounted now, all my holes drilled, everything is ready to go. I think I'm ready to pull everything off of it and start the sanding process, and then level and crown frets and start moving towards applying finish to this thing. It would be nice to get it done, he's been waiting WAY too long.
 
Did a quick, down and dirty fret level this morning.
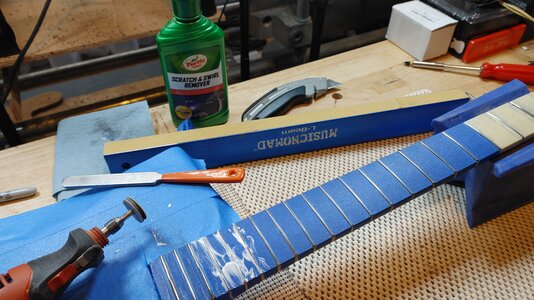
My method is pretty simple, because I'm pretty simple. As seen in the photo below, I use this 17.6" MusicNomad leveling beam to do the bulk of the work. I like the long one over my shorter 7" beam. I'd prefer to get the 24" beam, but I'm balancing budget here.
Once they are all flat, I use the little crowning file with the orange handle. Can't recall where I got that, but it's similar to the StewMac double-edge file. It works good and it's easy for an idiot like me to get them crowned without f'ing anything up too badly.
From there I break out my Black&Decker rotary tool (Dremel copy) with a little polishing wheel on it and use Turtle Wax scratch and swirl remover to polish them. The key here is to turn the rotary tool to the lowest setting and don't hang out on one fret for too terribly long because they do get hot and you can discolor them if you don't pay attention. -
20241105_110629.jpg
It's not rocket science, and I'm sure there's better posts on here covering fret leveling and crowning. I'm by no means "pro" at it, this is just my method and it gets them presentable. Fretwork is something I'm severely lacking, but I can make a guitar playable.
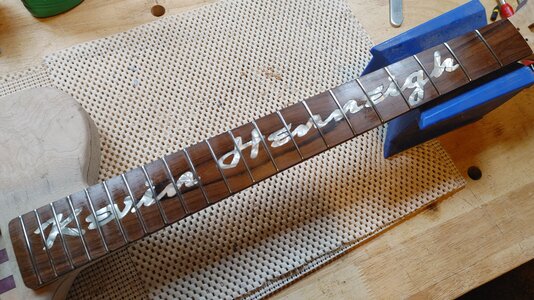
Once the tape is pulled I hit it with some StewMac Colortone Fretboard Finishing Oil and we have this -
20241105_113107.jpg
Yeah, I mean, I ain't mad at it. :cool:
We'll let that dry for a bit and then tape the whole fretboard off before we start a massive amount of sanding on this thing.
 
Yeah, agreed! I was using a 3/4"x3/4" steel tube that I brought home from the race car shop and sanded flat on my belt sander, verified with my machinist's straight edge, and Bob's your Uncle. It also had a good heft to it, so you really didn't have to do much other than glide it back and forth. It just wasn't pretty. 😁
 
  • Like
Reactions: Matt Liebenau
Okay, glued the main veneer back on last night, so the bulk of the headstock was ready to route this morning. Took care of that once again, using my templates and a couple pattern bits. Pulled template off without any tearout this time. Currently got the little "spacer" veneer glued and clamped under the nut. I'll let that dry for a while, I'm kinda busy today so it'll sit 'till tomorrow. I think...after all that...I'm back to where I was two days ago. 😒

I did not bookmatch this headstock veneer, I think the bookmatch seem was part of the issue with the tearout. So it's not as cool, but I think it looks fine. The truss rod cover covers up so much of it anyways that a bookmatch isn't terribly noticeable. I'm just gonna roll with it and hope nobody notices or complains. 🤣


If anyone complains give them Matt’s line, “If you’re so smart build it yourself. That’s what I did.”
 
I just couldn't help myself, so I had to play around a bit. :cool:
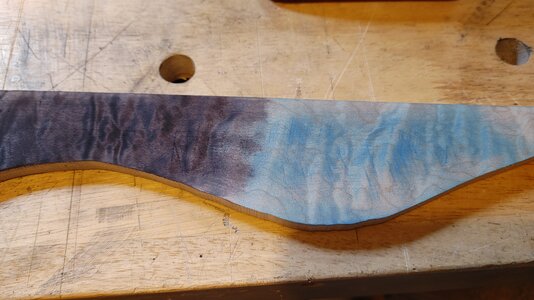
We're going Osmo Poly-X on this one. So I figured "why not see what it looks like?"

First I hit a scrap piece with some stain, in both black and blue -
20241108_152115.jpg
Might should have soaked that blue a bit more, but it'll be fine for this experiment. Hit that with the hair dryer and sand it back -
20241108_152809.jpg
Yeah, that's probably enough. Let's hit that with the Osmo...
20241108_153042.jpg
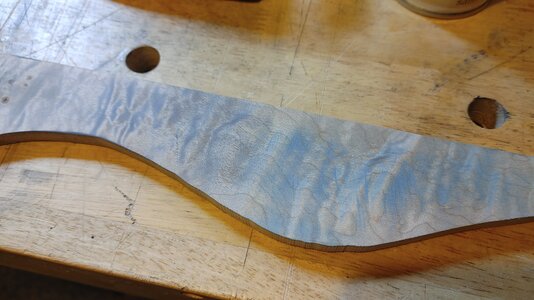
And a close up of the end without any stain, also shows some of those little burl spots -
20241108_153156.jpg
I kinda like the black sanded back quite a bit. I think it helps the grain pop a lot more. I don't think I like the blue.
I'm sure this will be a fight with my wife, who thinks she is the quality control department. She thinks all wood grain should just be left alone with no stains, ever. 🙄
And for those who are gonna ask, no I have not asked the client yet. I prefer to have a good plan in mind and then present it as "I think you should do this..." 😁
Anyways, I think I need to do a 2nd coat of the Osmo before I make a decision. In the mean time, I'm leaving tomorrow to head to SoFi Stadium for some Sunday Football. It's a work trip. :cool: So I'm not messing with this thing until next week some time.