Now it has two, I’m going to rub it once more and wipe one more coat. Then I let it harden for a week before playing.How many coats are you doing?
Enjoy the benefits of a premium membership!
Upgrade Account
-
Welcome to TalkBass! Want to remove ads? Register an account and login to see fewer ads, and become a Supporting Member to remove almost all ads.
You are using an out of date browser. It may not display this or other websites correctly.
You should upgrade or use an alternative browser.
You should upgrade or use an alternative browser.
What's On Your Workbench?
- Thread starter HaMMerHeD
- Start date
More options
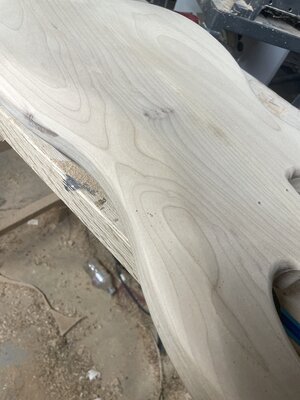
Who Replied?Gluing up a walnut top. Proof that a top doesn’t need to be bookmatched to be beautiful. In fact sometimes they’re more interesting when they aren’t matched 

A sneak peek at what this top will look like when finish is applied…
Figured I'd do a practice run for this Floyd Rose tremolo system before I start carving big holes in the face of my build. 
I found a scrap 2x6, which is close enough. I didn't even bother squaring it all off, I just need to learn the process here, we're not going for "pretty".
No real pics of the front routing for the flush mount part, because it is what it is. Put template on, rout it to depth. You do have to mark for the locating hole and drill that out, but it's not terribly hard either. I used my 1/2" forstner bit, which fit perfectly in the corner of the template and marked the location great due to the little brad point in the forstner bit itself. Easy-peasy. Then drill almost all the way through, flip and finish from back side to stop blow-out. I just routed it to some random depth. I'm not sure why StewMac even gives you a depth here because you're gonna come from the back side to a given depth from the top anyways, so I just went until I was happy with how deep it was.
For those who haven't done such a thing, this is the StewMac template set. You start by routing a typical flush mounted Floyd setup, and then move on to the recess setup. Routing the front was easy enough, but for those who have done this, you know that StewMac leaves out one important bit for the rear cavity template, the insert to route the block section deeper. So my first task was to build that insert, because without it I don't see how you could do this operation correctly.....


With my insert made this wasn't terribly difficult, and I had a rear cavity for the claw and springs....

Yeah, looks good for a first attempt.
From there you switch to the recess template set and rout your recess depth on the front. I went with 5/16" here for the "extra tremolo action", he was a hair metal guitarist, there's gonna be some squeedlies and a lot of meedlies and several of crazy dive bombs.
But yeah, after routing that I have this...


Yup, that'll work. And it all makes sense now. This is why we practice on scrap first.
I do want to give a quick shout-out to my man @Rôckhewer and his coworkers who were more than willing to chat with me on the phone. Sorry Rock, I forget the guy's name (I'm horrible with names) but I really appreciate his insight into how to approach this stuff and what the heck I'm doing. It helped a lot man! I think we're ready to move on to the real guitar now. But first I'm going to go spend a weekend in the San Yuan Islands on my buddy's boat....

Yes, we're spending the weekend on the boat. That thing is 72'-8" long (that's just over 22 meters for my non-American friends), has a full galley and has 4 state rooms in it.... Viking Yachts 72 Enclosed Bridge - 72EB


I found a scrap 2x6, which is close enough. I didn't even bother squaring it all off, I just need to learn the process here, we're not going for "pretty".
No real pics of the front routing for the flush mount part, because it is what it is. Put template on, rout it to depth. You do have to mark for the locating hole and drill that out, but it's not terribly hard either. I used my 1/2" forstner bit, which fit perfectly in the corner of the template and marked the location great due to the little brad point in the forstner bit itself. Easy-peasy. Then drill almost all the way through, flip and finish from back side to stop blow-out. I just routed it to some random depth. I'm not sure why StewMac even gives you a depth here because you're gonna come from the back side to a given depth from the top anyways, so I just went until I was happy with how deep it was.
For those who haven't done such a thing, this is the StewMac template set. You start by routing a typical flush mounted Floyd setup, and then move on to the recess setup. Routing the front was easy enough, but for those who have done this, you know that StewMac leaves out one important bit for the rear cavity template, the insert to route the block section deeper. So my first task was to build that insert, because without it I don't see how you could do this operation correctly.....


With my insert made this wasn't terribly difficult, and I had a rear cavity for the claw and springs....

Yeah, looks good for a first attempt.
From there you switch to the recess template set and rout your recess depth on the front. I went with 5/16" here for the "extra tremolo action", he was a hair metal guitarist, there's gonna be some squeedlies and a lot of meedlies and several of crazy dive bombs.
But yeah, after routing that I have this...


Yup, that'll work. And it all makes sense now. This is why we practice on scrap first.
I do want to give a quick shout-out to my man @Rôckhewer and his coworkers who were more than willing to chat with me on the phone. Sorry Rock, I forget the guy's name (I'm horrible with names) but I really appreciate his insight into how to approach this stuff and what the heck I'm doing. It helped a lot man! I think we're ready to move on to the real guitar now. But first I'm going to go spend a weekend in the San Yuan Islands on my buddy's boat....

Yes, we're spending the weekend on the boat. That thing is 72'-8" long (that's just over 22 meters for my non-American friends), has a full galley and has 4 state rooms in it.... Viking Yachts 72 Enclosed Bridge - 72EB
Good job on the practice piece. I feel like you could get some tools in a spare stateroom if you really wanted to work on the body. 

But first I'm going to go spend a weekend in the San Yuan Islands on my buddy's boat....
View attachment 7000353
Yes, we're spending the weekend on the boat. That thing is 72'-8" long (that's just over 22 meters for my non-American friends), has a full galley and has 4 state rooms in it.... Viking Yachts 72 Enclosed Bridge - 72EB


Looks like an amazing time … have fun !
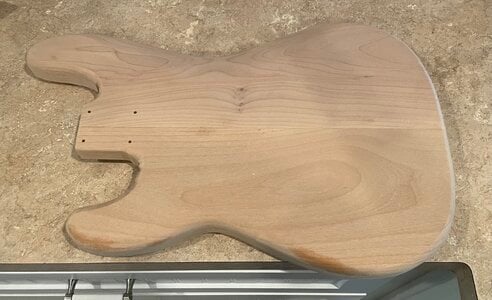
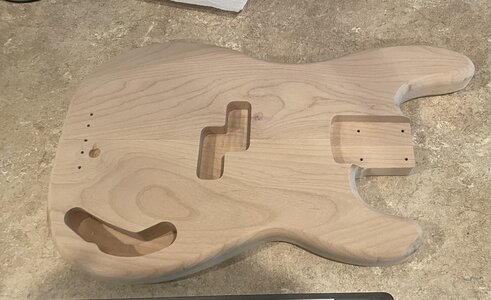
Slowly working on an alder P body
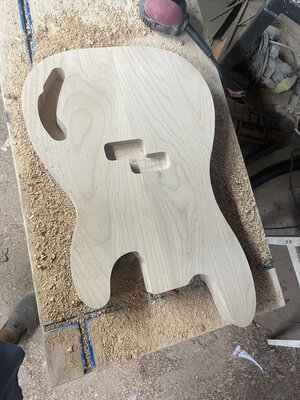
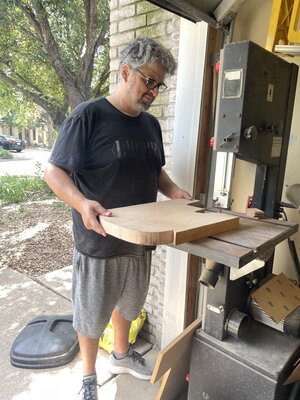
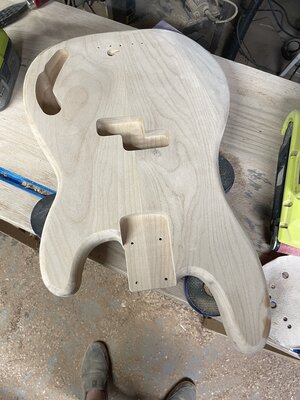
My friend Chris from CHC Guitars was kind enough to bandsaw the basic shape for me…. My little bandsaw would do it, but it would take a lot longer and I just can’t be in the heat that long. After that I did the routing. Still have a lot to do, but making progress. This is three days of work for me currently, stuff that I could do in 1.5 - 2 hours tops just 5-6 months ago. But at least I’m making progress and inching forward .
My friend Chris from CHC Guitars was kind enough to bandsaw the basic shape for me…. My little bandsaw would do it, but it would take a lot longer and I just can’t be in the heat that long. After that I did the routing. Still have a lot to do, but making progress. This is three days of work for me currently, stuff that I could do in 1.5 - 2 hours tops just 5-6 months ago. But at least I’m making progress and inching forward .
Attachments
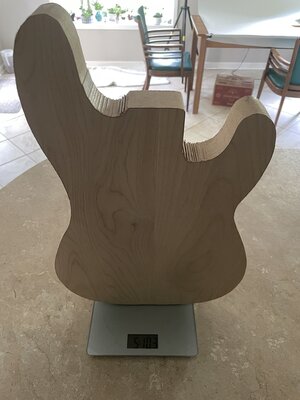
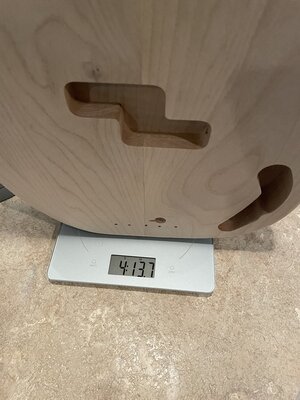
Managed a bit more. Lots of sanding (ugh) to go. Body is currently 4lb 13.7oz , so not a lightweight body, but certainly manageable. With planning should be around 9lbs complete.
Attachments
A little bit of work got done on the 5 string walnut topped bass shaped object…

Looking at the pic, the center line is getting a little faded, so I need to redraw that…
It’s going to be nice and lightweight as well. 5lbs 5oz with no routing done… so it should be 4.5lbs or a bit less when control cavity, pickup cavities, neck pocket, and any contouring is done.
It’s going to get these Nordstrand Fat Stacks and a Nordy preamp as well
Last edited:
Just off the bench. This morning I waxed the bass with Reneissance wax and wired a trim pot to the output to tame the bit high output of HAZ preamp. Plays wonderfully, balances nice and sounds very good. And that look of that cheap walnut top! I really like it a lot.
Rôckhewer
Commercial User
- Feb 28, 2015
- 2,816
- 8,351
- 5,121
- Disclosures
- Owner/Builder- RockHewer Custom Guitars LLC
Finally had one of these come through

Dang I miss basses. This was a lot o fun.


Dang I miss basses. This was a lot o fun.
Spending the day making some new templates


100 degrees and MDF dust….
Yuck.
100 degrees and MDF dust….
Yuck.
Last edited:
They look great. But sorry about the heat/dust. 
As for me, my task today was to fix my truck. Finally got that transfer case rebuilt and picked it up today. Got everything back in the truck and together, running good now so I think we're all good to go again. Nice to have my truck back after a few weeks of it being down. It's funny how many things you use your truck for that you don't think about until you don't have it.
As for me, my task today was to fix my truck. Finally got that transfer case rebuilt and picked it up today. Got everything back in the truck and together, running good now so I think we're all good to go again. Nice to have my truck back after a few weeks of it being down. It's funny how many things you use your truck for that you don't think about until you don't have it.
I’m glad you got it fixed !They look great. But sorry about the heat/dust.
As for me, my task today was to fix my truck. Finally got that transfer case rebuilt and picked it up today. Got everything back in the truck and together, running good now so I think we're all good to go again. Nice to have my truck back after a few weeks of it being down. It's funny how many things you use your truck for that you don't think about until you don't have it.
Making a teak and walnut urn for my father in laws ashes. Those were two of his favorite woods. I’m making it with teak sides, a walnut accent stripe, an inset walnut top, and a removable walnut bottom. He would have loved it.
It’s sad, but it’s also an honor to be asked to make it.


It’s sad, but it’s also an honor to be asked to make it.
Thank youSorry for your loss, that'll be a very fitting tribute.
Getting closer to completion on my Father In Laws urn. Hope to be applying finish by tonight. In the meantime I wiped on a little Osmo Polyx Satin finish on the bottom… it really brought the walnut to life. It’s going to make the teak and walnut on the urn itself look amazing.
I “think” it was @Beej who turned me on to the Osmo …. Thank you. This stuff isn’t cheap, but I think it’s a truly phenomenal product ! (And necks finished in this stuff feel oh so good…)
Pics of the bottom (with Osmo) and the urn itself (without Osmo yet)


I “think” it was @Beej who turned me on to the Osmo …. Thank you. This stuff isn’t cheap, but I think it’s a truly phenomenal product ! (And necks finished in this stuff feel oh so good…)
Pics of the bottom (with Osmo) and the urn itself (without Osmo yet)


