Winter 2017 Build Off - Speak of the Devil

My Devil Bass is a bolt-on that looks like a neck-thru. The "neck" of the body and the neck heel are the same width and smoothly blended together, and will feel almost like a neck-through. But they are held together with 5 bolts, and can be taken apart. So, the cutaways on mine will be a little wider than the Ampeg. The outside perimeter, horns, and triangular cutouts are the same dimensions as the Ampeg. Mine is 34 1/4" scale, 24 frets. The fingerboard extends a little beyond the 24th, ending in a curve that matches the look of the curve on the front of the pickguard. Overall, mine stays close to the Ampeg design in size, feel and look. But, I've fixed the problems, and made it into a real workable bass. That's what my customers want. Several of them already own Ampeg Devil Basses.
 
  • Like
Reactions: mapleglo
Close to the final design for the neck through.

2r5ci7k.jpg
 
You'd think it would be easy to just adjust everything for a neck through design. Not.

Preliminary design - needs some work.

1zdayo7.jpg


I had to adjust the headstock for regular tuners - and I'm still trying to decide if the 3/8" tuners are better than the 1/2" tuners.

And the body is still not right where it meets the neck through. But I'm getting closer I think.

And I can't find those last few frets. They're hiding under a layer somewhere.

I use the 3/8" tuners in everything except the Squier SS Jaguar and they work perfectly fine. Haven't had any problems with the Hipshot or the Licensed ones.
 
I use the 3/8" tuners in everything except the Squier SS Jaguar and they work perfectly fine. Haven't had any problems with the Hipshot or the Licensed ones.

I was using the 1/2" tuners on my builds because I like the way the larger post looks. But I tried the 3/8" tuners on the 4004 build as I found them used for less dollars, and I like that the holes are smaller, and that leads me to believe it will weaken the headstock less than the holes for the 1/2" tuners. This headstock is even smaller than the 4004, so I think I'll go with the 3/8" tuners again.

In the mean time, the truss rod and pickup template came in.

xfqln9.jpg


It's about an inch longer than the one I had, so I think it'll fit better. I also ordered a pair of truss rods from StewMac for the neck thru. I figured I'd give those a try.

The aluminum rod I bought also came in, but it was a little too deep I think - 1/4" by 1/2". So I ordered a 1/4" by 3/8" rod - I think that'll work better. The bigger one won't go to waste - I'll have enough in stock to make eleventy hundred aluminum nuts.
 
Just got back from the Tech Shop where I met our very own @Rôckhewer - thanks for doing that laser cut on the fretboard!

2ue6tn4.jpg


Here he is checking out the 4004 Snowglo. I have to say, that Tech Shop is amazing. Every tool anyone of us could want is there. Seriously thinking about a membership there.

mtmgko.jpg


I also received some more supplies from StewMac - truss rods, strap buttons, red color, and side fret markers.

And after looking at the laser cut flame, I'm almost tempted to just pour in clear epoxy, with perhaps a little red streaks. The laser burns the wood just a little, which is a pretty cool effect.
 
Just got back from the Tech Shop where I met our very own @Rôckhewer - thanks for doing that laser cut on the fretboard
My pleasure Nexy!
Great meeting you, & happy to help!

BTW , Folks....Nexy's Snowglo is a sweet axe with a killer Ricky growly tone!
 
On those Rockit guitar fingerboards, one of the tricks in making the flame inlays really stand out was putting crinkled aluminum foil on the backside. We did that on a few of them. Others were painted with sparkle silver or sparkle gold on the back. The cast flames were partially transparent, so the sparkly base shows through from deep.

Think about what you can use to treat the bottoms of the cavities in yours, before pouring in resin or epoxy. Even plain silver paint will brighten it up a lot. Then you could pour in West Systems (206 slow) tinted with red pigment. Mask off the fret slots with strips of 0.020" aluminum or steel.

Try a few test samples first, obviously.

Also, to get multiple colors in the flames, such as deep red going to bright red at the tips, mix up cups of the two or more colors at the same time. Pour them all at the same time, quickly, and let them mix themselves. For example, pour some bright red into the tips, then quickly add some medium red next to it, then fill the rest with dark red. As the resin settles in, the colors will mix somewhat at the junctures, but generally stay in their zones.

Rod poured some of the Rockit fingerboards in 5 colors.
 
Last edited:
Thanks for the tips about the flames. After seeing the result of the laser cut, I'm thinking about leaving some of the burned maple intact. The tin foil is a great idea, actually. Lots of options to think about.

Routing for the truss rods.

vy6pvr.jpg


npndd1.jpg


That would have been a lot easier on a CNC...

I've decided I'm going with 2 truss rods on the bolt-on. The neck is wider, so 2 truss rods makes more sense than using two on the narrower, neck through. I'm trying this aluminum bar, positioned between the truss rods. Why? Because I've never done it before :P
 
I don't think there will be enough room for crinkly tinfoil inside the cavities we cut...
But some kind of base coat would be cool.
Would need to make sure whatever it is will be compatible with the epoxy you pour in after though.... so that you don't wind up creating a "cold joint" of sorts affecting the bond between the epoxy & the wood.
Maybe pour /paint in a thin layer of epoxy first with some pearl dust mixed in, then a top layer with the different shades of red?
I haven't used west systems epoxy though, can it be thinned so that a pearlescent powder additive doesn't turn it into a gloppy mess that wouldn't flow out flat...?
Just thinking out loud here...
Good luck with it.
 
I agree that the burned effect of the laser cutting looks cool. The dark brown sidewalls give the flames a shadow look, some 3-D effect.

If it were mine, I'd use clear West Systems epoxy to fill most of it, with some red-tinted epoxy in the skinny tips. Subtle, with a hint of fire. It depends on what you plan for the color scheme of the rest of the bass. Maybe a wooden look, shaded darker around the perimeter, with some red down inside the triangular cutouts? And some red in the cavity around that pickup. Like something's burning down in there.
 
I might try some glitter, like this stuff:

2e0kdj5.jpg


sprinkled on top of a thin layer of epoxy painted on the bottom of the cavity. Then fill with clear streaked with red. I could use the silver glitter, or perhaps the red. I'll have to try a few different version on a test piece.

I still don't know what I'm going to do for a body finish. I originally wanted a white with a black burst, or red with a black burst per the original. But there's some nice flame in the body wood, and I'm not sure I want to cover that. I like your idea Bruce, clear with some red highlights around the perimeter and cutouts.
 
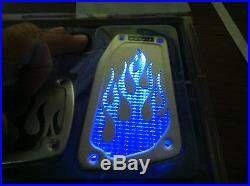
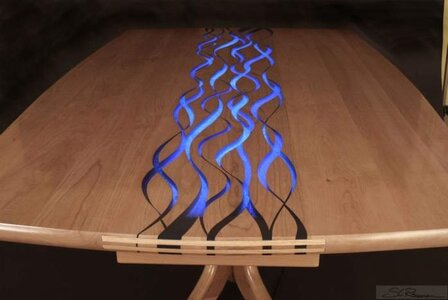
I think red LEDs lighting up the burnt wood inlay would look cool.

View attachment 1025523 View attachment 1025522
Lurker here, enjoying your progress MapleGlo.

Isn't there some sort of semi transparent reflective paint that will make the flames "move" when light reflects off them? I think that would be a really cool effect to have if it can be pulled off without looking cheesy.